How To Make a Soap Base at Home The RIGHT Way
Soap isn’t just for cleaning humans, pets, and objects. It gives one a feeling of well-being and, if it smells great, aromatherapy benefits too. It’s easier to just get some ready-made melt-and-pour soap and get on with the fancy decorating, but you are brave enough to start from scratch, and in the comforts of your home.
To make homemade soap base at home, mix fat or oil with lye and heat the mixture. Pour the melted liquid into molds and leave it to solidify. The hardened product is now your soap base. You can then use it to make new soap. Add extras, like fragrance, color, or texture, to make it unique.
This guide teaches you how to make a homemade soap base with foundation information, recipes, and tips. Continue reading for the specifics.
Swot Up Before Making Soap
Most of us take soap for granted, but if you want to make soap, understanding the chemistry behind its composition will give you a greater appreciation for the process of making it.
How Is Soap Defined in Soap Making?
Soap is the product of a combination of oil or fat and an alkali. The oil comes from plants or animals. The alkali is a chemical called sodium hydroxide (NaOH). Soap artisans use it to make solid soap and potassium hydroxide (KOH) to make liquid soap. Mixing both hydroxides results in shaving soap.
What Is Lye, and Why Is It Considered Dangerous?
Lye is the common term for sodium hydroxide, a major ingredient in soap making. It is a metal hydroxide from wood ash or a strong alkali that can be dissolved in water to produce caustic solutions.
This is why some are concerned with its use. Alone, it’s a corrosive material that causes eye, skin, and lung irritation. Lye is essential in soap making, however. Without it, we can’t make soap. We can be assured, though, that after the soap transformation process is complete, there won’t be any lye left in the resulting soap.
Can You Make Soap Without Lye?
No. Sue from the Sue & Soap series in the video below confirms that there is no other way to make soap (at least in this decade). When soap makers say they can make soap “without lye,” they mean they can create soap without dealing with lye. To achieve this, they use a kind of ready-made soap base called “melt-and-pour soap,” but this base is made with lye.
With melt-and-pour soap, you don’t make soap the traditional way (i.e., with lye and oil). Instead, you melt the ready-made soap base and pour it into a container for mixing with other ingredients to create a new kind of soap.
What Is Saponification?
When oil and lye are combined and heated, the result is soap and glycerol. This chemical reaction is called “saponification.” Without lye, saponification isn’t possible.
The Saponification Reaction:
triglyceride (fat/oil) + strong base (NaOH or KOH) = sodium salt (soap) + alcohol (glycerol)
How Is Oil Defined in Soap Making?
Oil consists of these fatty acids:
- lauric
- myristic
- palmitic
- stearic
- ricinoleic
- oleic
- linoleic
- linolenic
These acids are chemically bound to glycerol. This molecule is then called a triglyceride. To make soap, you need a strong base—either sodium hydroxide or potassium hydroxide—or a mixture of both.
What Is Glycerol?
In this oil-and-lye reaction, the alcohol burnt is glycerol—a colorless, odorless, viscous, sweet-tasting, non-toxic, and humidifying liquid used in cosmetics. It is commonly known as glycerin(e).
Because of glycerol’s antiviral and antimicrobial properties, the Food and Drug Administration has approved it for burn and wound treatments. It’s also a food sweetener, an effective measuring tool for liver ailments, and a humectant in pharmaceutical preparations.
How Much Lye Do You Need To Make Soap?
It’s okay to modify your ingredients’ quantity to vary the output of your soap batches, but it’s vital to calculate the proper amount of lye, to be on the safe side. This amount depends on the kind and quality of oil you use.
Use a saponification number to calculate how much sodium hydroxide or potassium hydroxide you need for a complete reaction. This number is different for every fat and oil, so you need a special lye calculator for this, like Soap Calc or the one offered by the Handcrafted Soap and Cosmetic Guild.
What happens if you use too much lye? The oil part will be saponified completely, but you will have excess sodium hydroxide, which isn’t good because it will cause skin irritations. And if there’s less, the sodium hydroxide will be consumed completely, and you will have excess unsaponified oil or partially saponified oil. This is what makes soap skin-safe. To be safe, use a lye discount, aka super fat.
What Is Super Fat?
If a recipe tells you to use 6% super fat, you must use 6% less sodium hydroxide than what you would calculate for a complete reaction. With super fat, you don’t add more oils; just reduce the amount of sodium hydroxide. That’s why it’s called a “lye discount.”
It’s safer to use less lye than needed to saponify oils in a recipe because of possible oil variables. Discounting the lye by 5% leaves 5% of unsaponified oil in a soap bar. This number is called super fat, which gives the soap a safety element and additional skin conditioning properties. Approximately 95% of the bar is soap, and 5% is an oil mixture that the skin absorbs.
Only when we use a lye discount can we be sure there’s no lye in the finished product and the soap is safe to use. A good amount of super fat is between 5 and 10%.
The Two Processes of Making Soap From Scratch
- Hot process: Uses outside heat to speed up saponification. You can use the hot process soap the next day. If you prefer harder soap, wait a week.
- Cold process: Uses naturally produced internal heat. Solidifying time takes four to six weeks.
Kinds of Soap Bases
Soap bases are categorized into liquid (shower gels, shampoos), soft (scrubs), and hard (standard soap). They come in three types: transparent, organic (has fewer chemicals), and white (from titanium dioxide used to make ornamental cosmetics).
The classic soap base has these components:
- distilled water
- 100% pure lye
- animal fat or vegetable oil
- glycerin
- surface-active substances (eliminate dirt and produce foam )
- optional additives: colorants, essential oil, skin-safe fragrance oil
These are some of the main ingredients in soap bases:
- clear glycerin
- aloe vera
- olive oil
- goat’s milk
- coconut milk
- shea/cocoa/mango butter
- oatmeal
- honey
These are fats and oils used in soap bases:
- lard
- tallow
- shea/cocoa/mango butter
- plant-based oils, like olive oil, coconut oil, and hemp oil
- fruit and nut-based oils, like avocado oil and almond oil
Variations on Soap Bases
Each soap base has specific properties. Use transparent or white, depending on your preferred color and how you want your soap to appear before experimenting with ingredients, research how they interact with each other and how the resulting soap will affect the skin.
Here are some ways to add variety to your soap bases:
- Aloe: Switch part or all of the water with liquid aloe vera. Using 100% of aloe vera may result in increased soap sweating.
- Milk: Add one to two teaspoons of powdered coconut or animal milk to melted oil.
- Fats or oils: Changing these (i.e., using plant oil instead of animal fat) affects the soap’s hardness and lather production.
- Base liquid: Water is a crucial ingredient in soap making because it helps the oil and lye achieve saponification. When soap hardens, water evaporates. Changing the base liquid affects the properties of the resulting soap.
Some experienced soapers use these liquids instead of water:
- goat’s milk
- coconut milk
- coffee
- tea
- beer
Senior soap makers recommend that beginners keep to distilled water because the above liquids are complicated to work with.
How To Make Soap Base the Standard Way
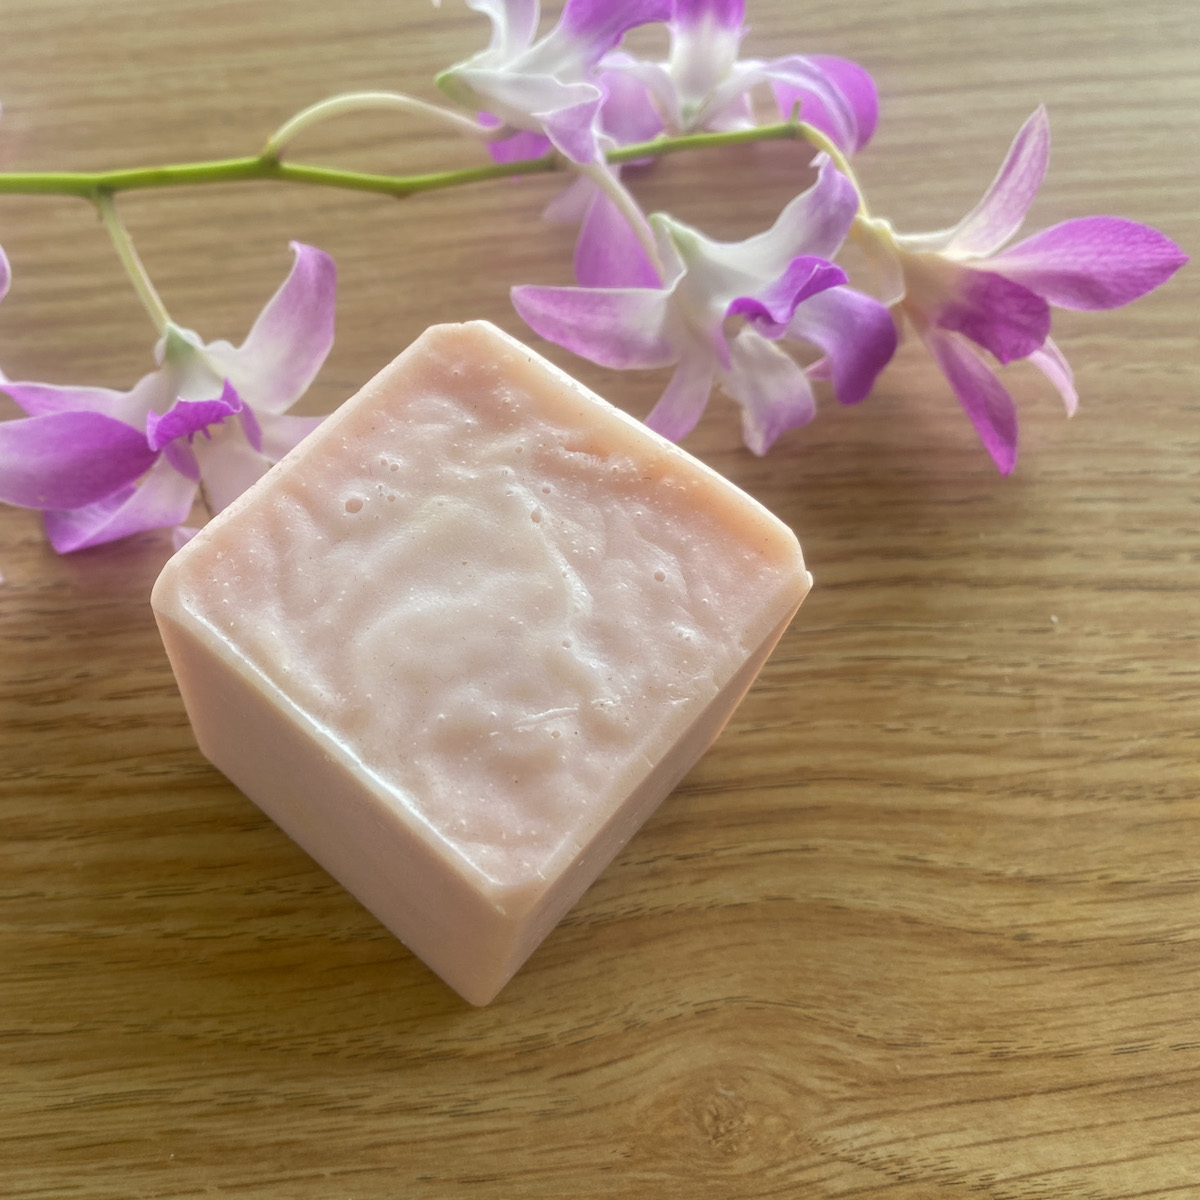
This recipe is for making a soap base using the hot process method. Hot process soap has an unsophisticated, rough-hewn appearance with a lighter scent. For a more noticeable smell, add more essential oil. For a smoother, more polished look, use the cold process method, which we will tackle in a separate article.
Ingredients
- coconut oil, 20 ounces
- olive oil, 20 ounces
- distilled water, 9 ounces
- 100% pure lye, 4.78 ounces
- optional additives: essential oils, colorants, dried herbs, or flowers
Procedure
- Safety first. Before proceeding, don your protective equipment: face mask, goggles, gloves, apron, long-sleeved-shirt trousers, and closed shoes. You may think this is going overboard, but the goal is to protect your skin from accidental burns or splashes.
- Measure the ingredients. Pour coconut oil into a slow cooker and set it to low. Alternatively, melt the oil in a pot over a stove.
- While waiting for the coconut oil to melt, slowly add lye to water* in a separate container while stirring carefully with a spatula. Expect the hot lye to release fumes. This is why you need a mask. Let the lye cool for 15-20 minutes.
- Stir the olive oil into the melted coconut oil.
- When the oils reach 120-130°F (48.9-54.4°C), slowly pour the lye in with them. Stir well with an immersion blender set to low. Move the blender in circles while keeping it immersed to prevent bubbles from forming.
- Blend for 10 to 15 minutes, or until the oil-and-lye mixture has taken on the appearance of pudding.
- Cover the pot or slow cooker. Cook the liquid on low heat for 50 minutes. If bubbles form, stir them away.
- Take the pot off the heat or turn the cooker off. Let the mixture cool until its temperature reaches below 180°F (82.2°C).
- Add colorants or essential oils, if desired. Mix well.
- Pour the mixture into silicone or plastic molds. Sprinkle the top with dried herbs, if desired. Use a spatula to smoothen the surface. Tap the molds on the tabletop to get rid of air bubbles. Let the mixture harden for 24 hours.
- Remove the soap from the cooled molds. Cut it into bars with a knife or soap cutter. You can either use the soap now or wait one week for it to dry completely (recommended to ensure quality and maximum solidification).
How To Make Soap Base the Quick Way
Impatient soap makers may appreciate a quicker method. This microwave heat process without sugar from Soap N Crafts produces transparent soap in less than 10 minutes.
Ingredients
Oil solution:
- coconut oil, 5 ounces
- stearic acid, 2.12 ounces (a saturated fatty acid from veggie or animal fats)
- glycerin, 14 ounces
Lye solution:
- lye, 1.20 ounces
- distilled water, 2.4 ounces
Solvent: 99% alcohol, 10.6 ounces
Procedure
- Mix the oil, stearic acid, and glycerin in a microwave-safe bowl. Heat the ingredients in the microwave for two to four minutes until completely melted.
- Pour distilled water into a heavy-duty plastic or stainless steel container. Add lye. Mix until the lye is fully dissolved. Pour this lye solution into the bowl containing the first mixture. Expect white clumps to form as a result.
- Whisk all the ingredients continuously until they adopt a texture resembling mashed potatoes.
- Pour the alcohol into the mixture.
- Cover the bowl with plastic wrap—microwave for one minute.
- Whisk until the liquid achieves a clear consistency. Pour it into silicone or plastic molds. Leave to set overnight.
- Remove the soap from the molds for use.
The folks at Soap N Crafts say this method produces a soap that sweats less than the standard soap base. They don’t recommend melting it again for future soaps because it may shrink due to its high alcohol and water content. So if you want to add color and scent, do this before pouring the mixture into molds.
How To Make a Glycerin (Transparent) Soap Base
There are many glycerin soap recipes online with specific measurements and safety guidelines, but they follow the same basic steps.
Ingredients
- distilled water
- liquid glycerin
- coconut or vegetable oil
- lye
- 70% proof alcohol from liquor (not rubbing alcohol or isopropyl alcohol)
Procedure
- Slowly add lye into the distilled water, then mix.
- Add this lye solution to the oils.
- Heat the mixture on a stove or in a slow cooker.
- Mix in the alcohol and glycerin. Blend well.
- Pour the fully melted mixture into molds. Leave to cool overnight or several days. The duration depends on your preferred solidity. Experts recommend making a big batch in one go to ensure you always have extra bars.
Tips and Tricks When Making Soap Base
- Always add lye to water, never water to lye*. The latter can trigger a hazardous chemical reaction.
- Never add the lye solution to base oils if these are above 180°F (82.2°C).
- When working with lye, always do so in a well-ventilated area. Don’t breathe in the fumes. Don’t touch the lye container with bare hands. This is why you need gloves.
- A standard bar of soap weighs 3.5 to 4 ounces. A recipe that produces 30 ounces of mixture yields 7 to 10 bars, depending on how the soap is cut.
- The amount of essential oil you use depends on its quality. High-quality oil means fewer drops.
- Since fragrance oils are concentrated, you need fewer drops.
- Stick to one colorant and fragrance source to monitor their effect on the completed soap—only experiment when you thoroughly understand ingredient interactions.
- If you dislike cutting soap bars, use individual molds or one mold with multiple cells.
Wonderful Extras
After you have mastered the soap creation process, you are free to formulate your own recipes and create custom soaps. Experiment with different kinds of colorants, butter, conditioning fats, fragrances, moisturizers, and nourishing oils. Your soap bases can be opaque, translucent, or transparent. The choice is yours.
The fun part comes when the soap base is completely melted. This is when you can let your creative juices run amok. There’s a wide variety of add-ins you can pour or sprinkle on to make your soap one-of-a-kind. What makes soap unique are the additives, such as dried herbs, sponge or loofah bits, seeds, flower petals, skin conditioners, colors, and fragrances that change the appearance, scent, texture, shape, and design of your soaps.
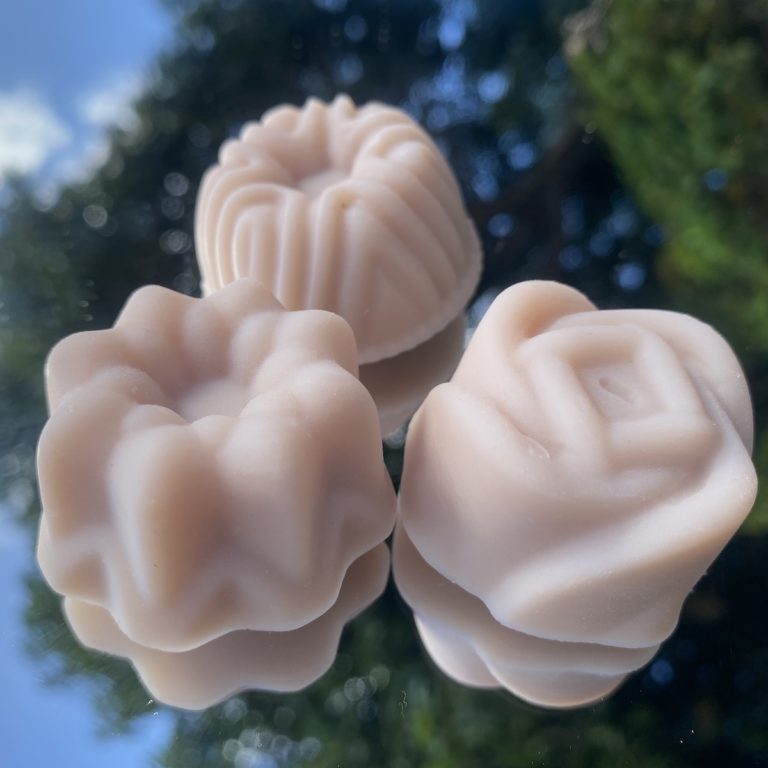
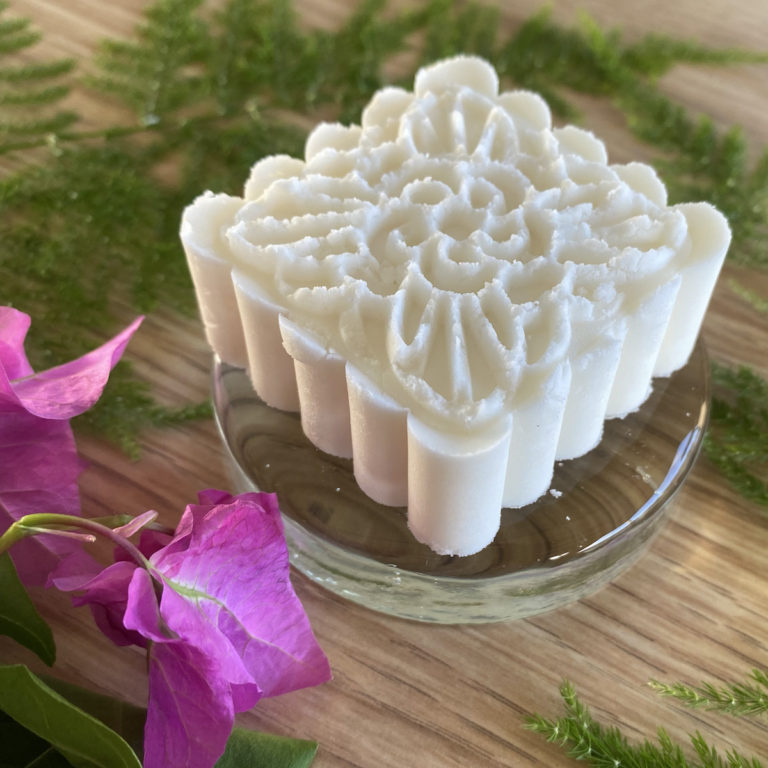
A homemade soap base is also excellent for creating embedded shapes. You can achieve this by getting molds with pre-embossed designs. If you want to create your own designs, try sculpting various shapes, painting artwork, or engraving your customers’ initials on the soap.
Infuse your soap base with flowers, seeds, or herbs. Soapers who cultivate gardens can use their homegrown flowers and herbs. Note that even though additional ingredients won’t lessen glycerin’s moisturizing and healing properties, they increase the risk for adverse effects on the skin, especially irritation.
If you want to customize your soaps, check out Jan Berry’s book, Easy Homemade Melt and Pour Soaps: A Modern Guide to Making Custom Creations Using Natural Ingredients & Essential Oils (paperback).
Fragrance
Soap doesn’t need a fragrance to clean the skin. But pleasant smells are always appreciated. To add fragrance to your soaps, use essential oils or fragrance oils. The former is typically made from plants and can be combined with other varieties to create bespoke aromas. The latter is usually synthetic.
When buying fragrance oil, check that it is skin-safe and cosmetic-grade. The essential oils by Radiance are a good bet because they are certified Made Safe. You can use your favorite fragrances, as long as they come in a form that can be easily poured out of their containers.
Soap making guides recommend adding no more than 0.3 to 0.4 ounces of fragrance oils to a pound of soap base, but the exact amount depends on your preference and the kind and intensity of the scent.
These are some of the popular options for adding fragrance:
- Essential oils: These are perfect for maintaining the organic and natural components of your soap. However, they don’t always work out well because they vary in smell, consistency, and effect on the skin. Some people are allergic to certain ingredients in essential oils.
- Fragrance oils: These are stronger and longer lasting than essential oils, but they are synthetic and therefore not considered natural.
- Perfume: Since most perfumes are alcohol-based, this can give rise to problems. So, temper their use.
Oils and Skin Conditioners
Adding oil to a soap base gives the finished soap moisturizing and conditioning properties. However, you should strive for an optimal balance of oil and soap to prevent the soap from becoming too greasy or soft. When you’re just starting out in soap making, it’s better to be very cautious in adding extra oils or avoid them altogether.
The general rule is to add not more than 1 to 3% of oil to the total weight of the soap base, or about one tablespoon for every pound. One tablespoon of oil weighs below .5 ounces, so add .3 ounces of oil to 10 ounces of soap.
Skin-conditioning additives, such as honey, lend nourishing properties to soap. Consult the recipe for the exact measurements. Don’t just use rough estimates, especially if you’re experimenting with unusual or non-standard soap additives.
Color
These are some of the popular options for adding color:
- Color blocks: They’re a cinch to use and come in matte or shimmery variants.
- Clay: It gives soap gentle, earthy hues and has oil and toxin-absorbing qualities. Mix with water before adding it to the melted soap base.
- Pigment powder: It gives soap vibrant colors but is not as convenient as color blocks. Mix with rubbing alcohol before adding it to the soap base.
- Mica: Its wide variety of colors makes it a staple in the production of cosmetics. Mix in the same way as pigment powder.
Fun Mix-Ins
Solid mix-ins can be an exciting way to decorate soap. Examples include oatmeal, poppy seeds, lavender, fresh herbs, or chunks of loofah. They make soap visually appealing and give it gentle exfoliating properties. However, Novices should take it easy with solid additions because putting a lot can prevent the soap from binding.
Factors To Consider When Making Soap Bases
What Makes Soap Bases Clear or Opaque?
Most homemade soap recipes produce a somewhat translucent, off-white soap—not transparent. Propylene glycol makes soap bases clear. It’s not as convenient to obtain as vegetable glycerin, though. Zinc oxide makes the soap base whiter and more opaque. Commercial soap base has the most white appearance.
Why Does Soap Base Sweat and How Do You Curb It?
Soap sweating means glycerin dew appears on the surface of the soap. This usually happens in humid environments. Melt-and-pour soap base tends to sweat the most because of its high glycerin content, making it highly conducive to melting.
Some soap makers attempt to control sweating by adding arrowroot to their soap base. (Arrowroot is a fine-grained starch from a West Indian herbaceous plant used in medicine and cuisine.) If your soap sweats while curing, blot the dew with a paper towel or clean dishcloth. Also, wrap your finished soaps in airtight packaging. Try Biolefin’s biodegradable shrink wrap from The Nova Studio.
Another way to curb sweating is to put a dehumidifier or DampRid containers in the soap storage room. Jan Berry uses two DampRids simultaneously during peak humidity times in the summer.
In any case, sweaty soap should not be a major concern because it will still melt if you want to use it for future soap projects.
Where To Learn More
For more information on making homemade soap bases, check out these articles and books:
- Al Bullington’s SoapBizKit ($37) is a guidebook that claims to help soap makers market their soap better. It also contains recipes, a marketing template, a catalog, and pricing information.
- Oil & Butter Blog Spot
- Scientific Soapmaking: The Chemistry of the Cold Process by Kevin M. Dunn
- The Complete Guide to Natural Soap Making: Create 65 All-Natural Cold-Process, Hot-Process, Liquid, Melt-and-Pour, and Hand-Milled Soaps by Amanda Gail Aaron
- Soap and Cosmetic Labeling: How to Follow the Rules and Regs Explained in Plain English by Marie Gale
And check out these videos:
Good Earth Spa:
10 Minute Natural Soap Base:
Soaping 101:
Where To Buy
- Essential Depot: They sell lye, essential oils, soap packaging, and soap making starter kits. They offer free shipping throughout the mainland and the territories.
- Soap n Crafts: This Canadian company sells a range of body care products classified as exclusively green cosmetics, meaning they are made of pure and natural ingredients.
- Brambleberry Handcraft Provisions: This offers myriad supplies and plenty of recipes for making various kinds of soaps.
Nature’s Garden Wholesale Candle and Soap Supplies
It is the nation’s largest distributor of unique, concentrated, wholesale fragrance oils. It carries fragrance oils, bath/cosmetic/packaging supplies, incense, herbs, and spices. It has starter kits for making melt-and-pour soap, salt scrubs, wax tarts, body butter, lip balm, lotions, hair conditioners, facial masks, and candles.
Nature’s Garden also offers free recipes, soap making classes, and advertising to their customers by allowing them to upload photos of their creations on their Facebook and Show & Tell Creations pages:
- Elements Bath & Body carries wholesale supplies (including packaging) for making cosmetics, toiletries, and soap. Its learning center offers recipes, tutorials, online calculators, and tips.
- Botanie Soap offers wholesale organic soap bases, ingredients, tools, and custom labeling and packaging for soap making.
Conclusion
Handcrafted soap making is a fulfilling activity with multiple benefits: it brings back people to a grassroots lifestyle, reinforces self-reliance, and fosters the natural creation of products.
It takes time to master the process, so don’t be disheartened if your first try isn’t perfect. The more soap you make, the better at it you’ll be. If you don’t want to start from scratch or deal with lye, use a melt-and-pour soap base. You can always supplement your knowledge with classes or workshops.
Whatever stage in the process you’re in, we wish you a fab time making soap.