How To Make Soap With Hot Process: The Ultimate Guide
Hot process soap making is an easy way to make short work of making soap. Understanding the difference between hot and cold process soaps can be a little confusing at first, but how do you make soap with hot process?
The short version: to make soap with hot process, use lye and oil to make your soap batter, then cook your soap mixture in a slow cooker (like a crockpot), double boiler, oven, or microwae. The hot process of soapmaking produces quick-saponifying soaps that retain fragrance and often their color better than other soaps.
Confused about the difference between hot process soaps and cold process soaps? Curious about how to get started making hot process soap at home? I’ve compiled all you need to know about hot process soap making as well as step-by-step instructions so that you can get cooking.
Hot Process vs. Cold Process: What’s the Difference?
There are two significant ways to make soap: hot and cold process. Although both processes require the same ingredients, each soapmaking method will produce different results.
Hot Process
Hot process soapmaking is a method in which the soap ingredients are heated by an external source to saponify your mixture before pouring. It really is more of an advanced technique and I strongly advise you get a good hanful of successful cold process batches under your belt before attempting this.
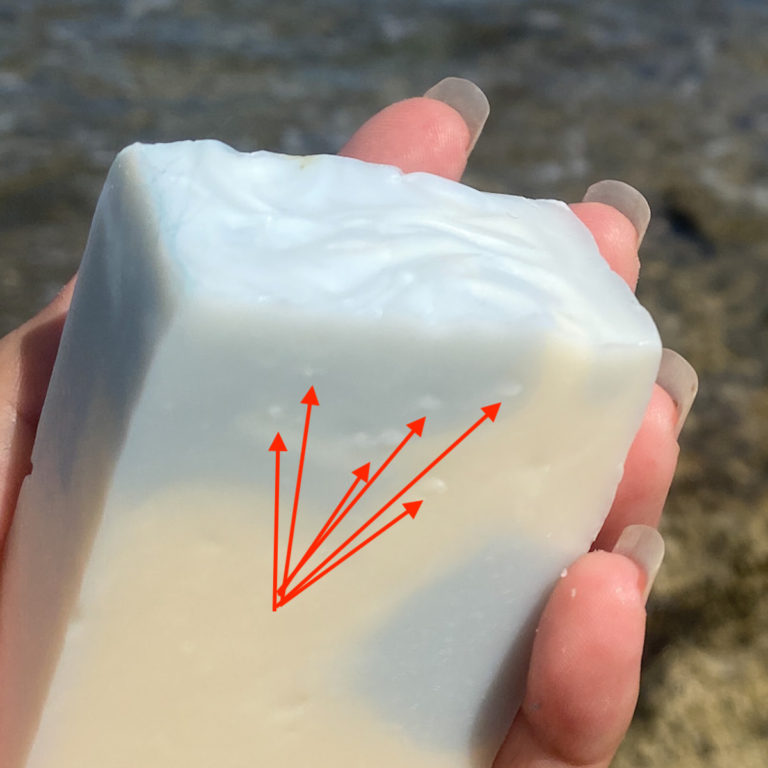
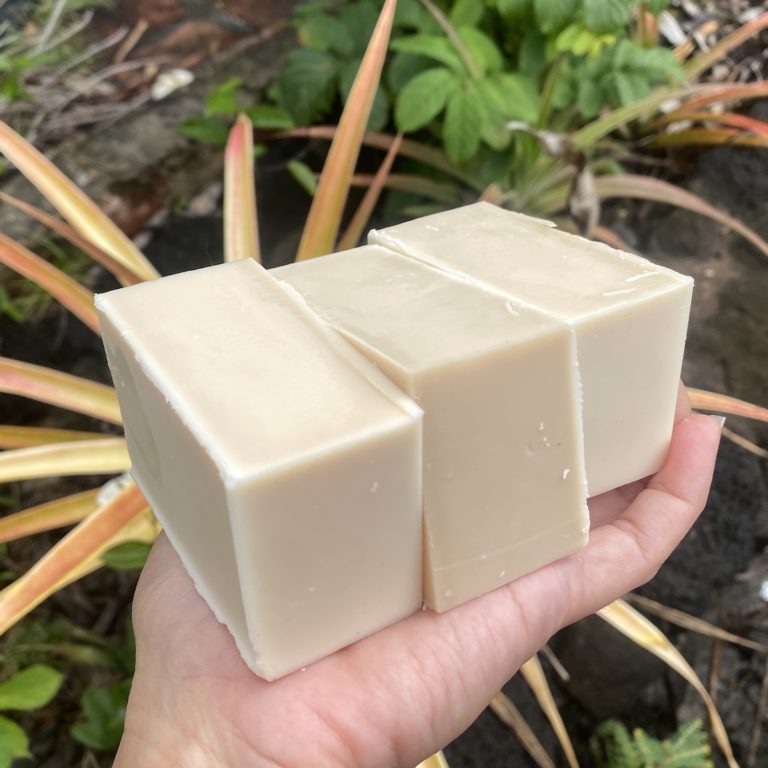
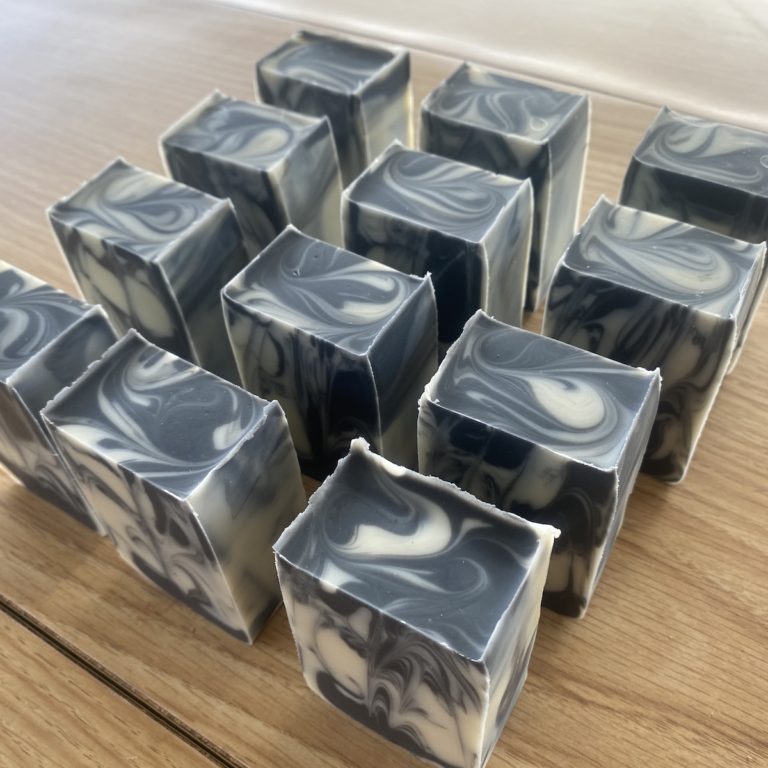
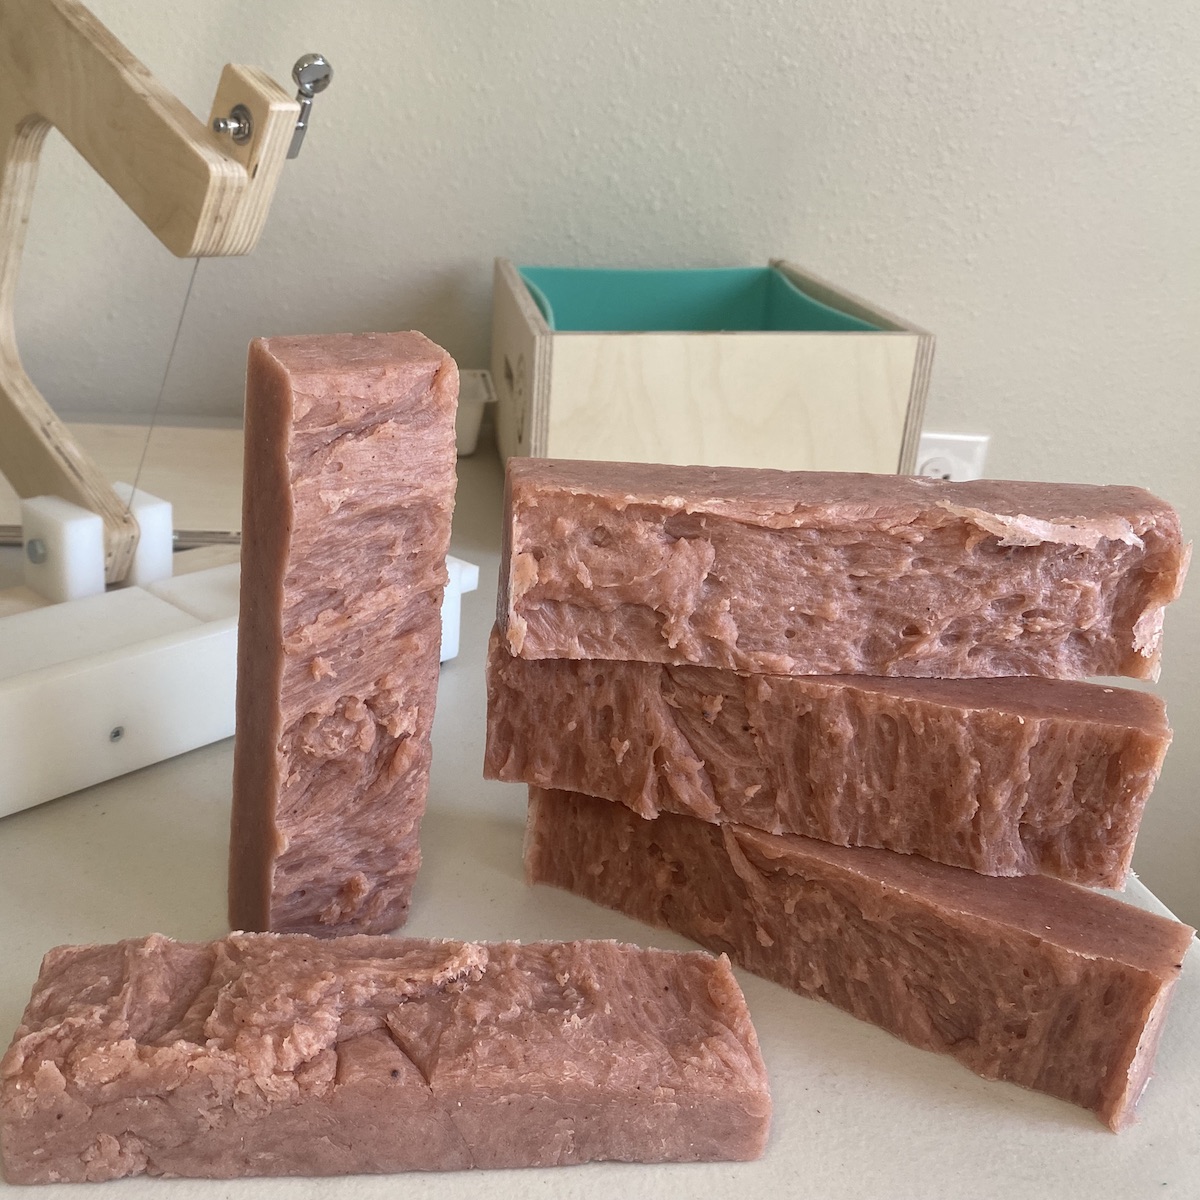
Hot process soaps generally look less refined than cold process soaps, and they have more of a grainy, rustic texture. This texture could be favorable for some soaps, although it all boils down to personal preference. Generally, hot process soaps have a handcrafted, artisanal look, which could be preferable if you want a natural, handcrafted-looking soap.
It can also be challenging to incorporate swirls or designs into hot process soaps since the batter is so much thicker than cold process batter and you need to work quickly before the soap hardens up and becomes unworkable, but with the right techniques, it can be done. The more experienced you are with hot process, the better your chances are of creating designs because you’ll know how to work quickly and recognize the signs of soap becoming too hard to work with.
Knowing that it definitely takes time to master the art of hot process designs, if you want to make elaborate swirls and layers in whatnot in your bars of soap, you may want to use the cold process.
However, hot process soaps take way, way, WAY less time to saponify, and you can use them only one day after pouring your soap mixture into their molds. Still, it is better to let the soap sit for a week or two before using it to ensure that it has solidified entirely before use, but the wait time is a lot shorter than cold process soaps. This short wait time, plus the fact that you can unmold hot process soaps rather quickly and use your mold for the next batch of soap, makes hot process soapmaking an excellent option for those who want to produce large quantities of soap in a short amount of time.
Quicker, easier cleanup is another factor that makes hot process nice for producing large quantities of soap. With cold process, soap batter is still caustic for weeks, and the batter is greasy, so its kind of a pain to clean up. With hot process, the soap saponifies as you cook it, so you can just bubble up your soap tools in the sink, and they’re ready to be used again.
Because pigments and fragrances are added to hot process soaps after the soap has cooked, hot process soaps carry oils better than cold process soaps. If you want your soap to have an intense, fragrant smell, save money on essential oils and fragrances, or reduce the amount of essential oils you need (remember it sometimes takes hundreds of pounds of plant matter to produce a pound of essential oils) the hot process is probably the best option.
I use essential oils exclusively, but I hear soapers who use fragrances can experience acceleration in cold process depending on how well their fragrance oil behaves in soap batter. Hot process eliminates that worry since you add oils after the cook and a period of cooling to a temperture you’re comfortable adding your fragrance or essential oils at (typically thats 140F – 160F).
I work a lot with essential oils and I noticed that some essential oils would disappear in soap, which is beyond frustrating because if I’m at a pop-up event and someone comes up to sniff my soaps, I want to hear MMMMMM, not “oh, it’s really mild.” I found out after hours (many hours) of research that components in certain essential oils with react with lye or the high alkalinity in unsaponified soap batter, and that the lye would in a way “eat” the essential oils. One essential oil that does that is the ever-popular lavender (one of my bestsellers at pop-up events). So now any soap I make that includes lavender essential oil or others that are deemed “reactive” gets the hot process treatment.
While you’ll need less fragrance and essential oils than cold process, you need more water in your batter to keep it workable.
Cold Process
Cold process soaps are not externally heated when you make them, so they take much longer to saponify and they also retain their water as you’re working with the batter. It will thicken up for sure, but prior to it coming to a medium or thick trace, generally, this means that you can add more elaborate designs to cold-process soaps without your decorations melting into the bar. Cold process soaps are also more dense than hot process soaps, and they have more of a smooth, glossy texture than hot process soaps.
It can take a while for cold process soap to finish saponifying, with most cold process soaps taking up to 4 weeks to fully saponify (though most saponification will have happened within the first 24 hours).
Random interesting fact for you – did you know saponification means “soap making” in Latin?
Ok, back to the point – during the saponification of cold process soaps, the chemical reactions that occur between the ingredients in your soap will generate heat on their own, so in a way it goes through a heating process, but that process is not directed by you and its much more hands off.
This is the method I prefer for soaps that do not contain an essential oil blend that contains reactive oils.
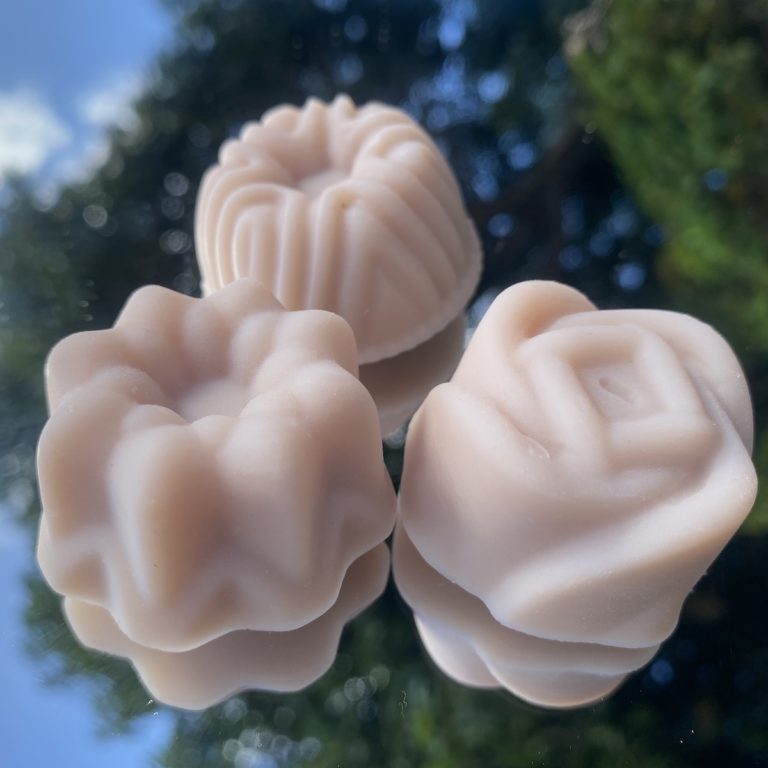
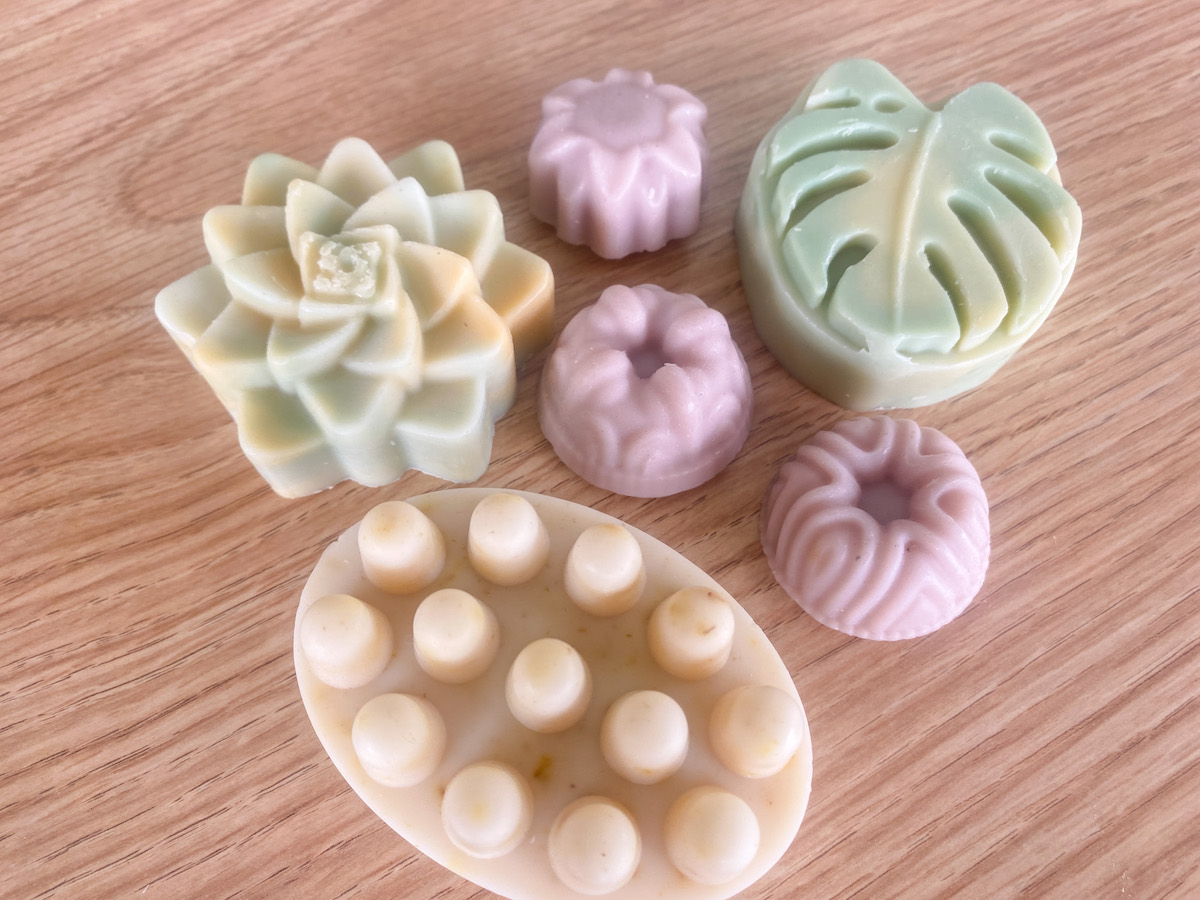
I find more freedom in designing with cold process soaps, as they can be poured into detailed molds at thin or medium trace, and it’s a lot easier to swirl with thinner soap batters. Here are some design examples of what I can do fairly easily with cold process.
Pros and Cons
In summary, hot and cold process soaps have some pros and cons to weigh out before deciding which method is the best for you.
| Hot Process | Cold Process | |
| Pros | It takes one day – one week before you can give it away and sell it, though the standard 4-6 week cure time will produce a much better, longer-lasting soap. You can often achieve more rich, pigmented colors. You can use less essential oils or fragrance oils than is often required to produce the same smell in cold process | It requires no heat source. It is far easier to make designs and swirls. Requires less hands on time |
| Cons | It requires a heat source (and therefore energy) to cook. It’s more difficult to achieve nice designs and swirls. Requires more hands on time than cold process. | It can mess with colors and fragrances. It takes up to 4 weeks to fully saponify. |
What Is in Hot Process Soaps?
Lye
Well technically, there is no lye in the finished soap, but its one of the most important ingredients used because it’s what turns oils into soap. Lye, a shortened form of the word alkali, is a hydroxide solution, usually made from wood ash. Lye has a pH of 14, making it the most potent base that you can get. Since lye is a strong base, it can easily dissolve fats. When making soap, you combine lye with fats which neutralizes it to a PH of about 9.
Raw lye is so caustic that it can burn through skin, fabric, and plastic. Lye can also react with aluminum and tin, so you should never store lye in containers made with these metals or touch them to your soap batter. When you make soap, lye is a necessary ingredient, but you should always be very careful when handling it.
It is easy to be intimidated by working with lye, but you ca make soap safely as long as you take the right safety precautions. Always wear gloves, goggles, and long sleeves when you are mixing lye solutions. If you get any lye on your skin, rinse it off immediately with cool, running water. And always add your lye to water, NEVER add water to lye.
There are two main types of lye used in soap making: potassium hydroxide and sodium hydroxide. The type of lye that you use when you make soap will determine the solidity of the soap.
Liquid soaps are made with a lye chemical called potassium hydroxide. Soaps made with potassium hydroxide are transparent or clear. Potassium hydroxide is also more water-soluble than sodium hydroxide, so it makes soaps stay in liquid form.
To make solid soaps, you will need to use sodium hydroxide lye. This type of lye is less water-soluble than potassium hydroxide, and it makes sturdy, solid bars of soap. Generally, sodium hydroxide lye is easier to find than potassium hydroxide, and you can even get it on amazon or your local hardware store. The stuff you find at the hardware store is probably of lower quality, so buy from a good supplier like Essential Depot or a lab if you can.
If you don’t want to spend any money on lye and just want to experiment, you can trying make your own for no cost at all. All you need to make your own lye are some wood ashes and water. If you are making homemade lye, you should always wear gloves, goggles, and a face mask when handling it. To make lye:
- Collect ashes. If you are making bar soap, you should collect white ashes from softwood trees such as oak, birch, beech, or ash.
- Soak the ashes. In a ceramic, wood, heavy-duty plastic, or stainless steel container, combine the ashes with just enough water to make a paste. Do not add so much water that the ashes are floating.
- Let it sit for three to seven days. Let the ash and water solution sit to allow the ashes to react with the water. You should keep your lye container in an outdoor area since the reaction’s fumes can be toxic.
- Test the lye. You can test the strength of your lye water by placing an egg in your mixture. If the egg floats, leaving a nickel-sized spot exposed, your lye is ready to strain.
- Strain the lye water. You should make sure that you have all of your safety gear on for this step since the lye may splash when you pour it. Strain the lye water with a sieve, cheesecloth, or towel. The resulting lye water is your finished product and what you would use to mix with oils to produce soap.
Disclaimer: I have never tried this, and from what I’ve heard, results vary. I personally think you’re better off buying lye because you’ll get a much more predictable result, but this does sound lie a fun experiment I might try one day (but I won’t sell the resulting soap to you or anyone you care about, don’t worry)
Generally, it is good to remember that sodium hydroxide makes more solid, opaque soaps while potassium hydroxide makes transparent liquid soaps. You should also not forget to always use caution when working with lye.
Oils
You can use almost any oil type to make hot process soaps, but some oils will last longer and lather better than others. When deciding what oils you want to use in your soaps, you might want to consider the oils’ shelf-life and their benefits when used in a soap solution.
- Canola Oil. Canola oil adds thickness to your soap, and its shelf life is typically one year.
- Castor Oil. Castor oil makes your soap clear and foamy, and it typically lasts for two years.
- Coconut Oil. Coconut oil is antibacterial and antifungal, making it a powerful cleanser and moisturizer. Coconut oil stays fresh for about 18 months.
- Fractionated Coconut Oil. Fractionated coconut oil has been processed to make it a liquid, even in cold temperatures. It also lasts longer than regular coconut oil, staying fresh for about two years.
- Hemp Seed Oil. Hemp seed oil is an excellent moisturizer, and its fatty acids make it perfect for soap making. However, hemp seed oil only stays fresh for about three months.
- Jojoba Oil. Jojoba oil is a favorite for skin products, so it is best for hand soap and body soap. It lasts for about two years.
- Olive Oil. Olive oil makes a clear liquid soap, and it adds extra bubbles to your mixture. Olive oil also typically has a two-year shelf life, making it a long-lasting soap ingredient.
- Shea Butter. Renowned for its moisturizing properties, shea butter makes thick, solid soaps with an intense lather. It stays fresh for up to two years.
- Sunflower Oil. Sunflower oil contains vitamin E, making it intensely moisturizing and helpful for repairing damaged skin. It has a shelf-life of six months.
Mixing these oils will produce different effects in your soaps. You can use any of them in any combination, so the sky truly is the limit when it comes to picking your favorite oils for soapmaking. Generally, solid fats will make a denser, thicker soap, and thinner liquid oils create a more creamy soap.
Why Should I Make My Own Soap?
Making your own hot process soaps is an excellent way to save money, produce less plastic waste, and help the environment, and it can be a lot of fun.
Save Money
Buying soap can be expensive, especially when there are so many different types of soap to buy. Having various soaps for laundry, hand-washing, showering, household cleaning, and even pet washing can be a significant investment. However, homemade soap is simple, and you can use it to clean absolutely anything.
Produce Less Plastic Waste
Are you tired of throwing out old soap bottles and packages, only to get more every month? Making your own soap produces no plastic or manufacturing waste, so soapmaking can cut down how much trash and recycling you create. When you make your own soap, you can reuse old soap containers to store your new cleansing creations.
Help the Environment
Homemade soap is also biodegradable. A lot of store-bought soaps contain chemicals that are harmful to the environment. Antibacterial chemicals and phosphates are often included in the products of most leading soap brands, but both of these chemicals can lead to the destruction of aquatic ecosystems.
These chemicals that are often found in mass-market soaps do not degrade, which means that once they have been washed down the drain, they can never be broken down into the soil. Antibacterial agents and phosphates often find their way into lakes, ponds, rivers, and streams. When these chemicals get into natural water sources, they can kill plants and animals, causing an unbalance in the ecosystem.
Antibacterial soaps kill helpful bacteria in the environment, and plants can even absorb them into their roots, killing the plants. Phosphates, which reduce the flow of oxygen in natural water sources, cause the overgrowth of algae in ponds and lakes. Algae overgrowth chokes out all life in ponds and lakes, so phosphates are a chemical that you should always avoid when making soap.
Making your own hot process soaps helps your budget and the environment. Since soapmaking is a fun way to be responsible and economical, learning to make your own soap at home is a great skill to learn.
Now that you know a little more about the differences between hot and cold process soaps, you can decide which kind you want to make. Generally, hot process soaps are a great starting point for soap making beginners since the turnaround time is significantly shorter.
Gather Your Supplies and Wear PPE
To make hot process soap, you will need some specific tools. When working with lye, you should never use aluminum or tin since lye reacts with these metals. You should also always wear gloves, an apron, and long sleeves when working with lye to prevent any injuries. To safely make a hot process soap, you will need:
- A slow cooker or crockpot
- A plastic, glass, or ceramic measuring cup
- A plastic, glass, ceramic, or stainless steel container to mix the lye with water
- A kitchen scale
- A wooden or silicone spoon
- A stick blender
- A soap mold
- An apron
- Safety goggles
- Gloves
- A well-ventilated workspace
Use a Recipe or a Soap Calculator
In addition, you will need a hot process soap recipe before you get started. You can use my recipe or use a soap calculator, like SoapCalc, to make your own recipe. Getting the right ratio of ingredients is imperative when making soap since adding too much lye can burn your skin, and adding too much fat can result in a latherless soap.
If you want to use my recipe, you will need:
- 20 oz coconut oil
- 10 oz olive oil
- 9 oz distilled water
- 4.87 oz pure lye
- Essential oils (optional)
Once you have all of your supplies and ingredients laid out in a well-ventilated workspace, it is time to get cooking.
Melt Your Oils
To start, measure out your oils and put them in the slow cooker or crockpot on low/medium heat until the fat has completely melted.
Measure Your Lye and Water
While your oils are melting, use a scale to measure out your lye and water. Make sure to handle the lye with extreme caution. Wear gloves, an apron, safety goggles, and long sleeves to prevent getting any lye on your skin. If you do come in contact with lye, rinse it off immediately.
Mix Your Lye Solution
Pour the water into a large container. Using a wooden or silicone spoon, slowly add the lye into the water, making sure not to splash the solution. Mix until the lye has completely dissolved. When you add lye to water, a chemical reaction causes the solution to get very hot. Touching this solution could quickly burn your skin, so you should always use caution during this step. If at all possible, do this step on a stove with the vent hood on.
Add Your Lye Solution to the Oils
Before adding your lye solution into the oils, you may want to check the oils’ temperature. If your oils are too hot, the lye might foam up and boil over your slow cooker, causing a dangerous and hard-to-clean mess. If your oils are over 160° F (71° C), you should let the oils cool before adding the lye solution. Once your oils are at the right temperature, slowly pour your lye solution into the slow cooker or crockpot.
Stir With Your Stick Blender
Once you have added the lye solution into the oils, plug in your stick blender and start mixing the soap mixture with it. It is generally better to set your stick blender on its lowest setting when mixing the soap. Use short pulses when mixing this solution to ensure that there is no splashing. It would be best if you blended your soap for a few minutes. You will start to see the mixture thicken, and you will know that the soap is wholly mixed when it is the consistency of pudding.
Cover Your Slow Cooker and Let It Sit
Once your soap mixture is the right consistency, the hard part is over. Now, cover your crockpot, adjust the heat to low, and let the soap mixture cook for 50 minutes. While your soap is cooking, it may bubble. Bubbling and expanding is normal. If the bubbles start to rise too close to the top of the pot, give the soap mixture a gentle stir to pop all of the bubbles.
Prepare Your Molds
While you are waiting for the soap to cook, you may want to prepare your molds for pouring. If you are using non-silicone molds, you should line them with parchment paper. If you are using silicone molds, you may want to spray a bit of isopropyl alcohol or ethyl alcohol into the molds to prevent the soap from forming bubbles or sticking.
Test Your Soap
After the 50 minutes have passed, you should check your soap to ensure that all of the lye has dissolved. The soap should look a little bit like mashed potatoes at this point. Now, there are two ways that you can test the soap.
I usually test the mixture by taking a fork, lifting a pinch of the soap mixture out of the pot, and allowing it to cool. Next, I put the edge of my tongue on the soap. If I taste the strong, bitter taste of lye, I know that the soap needs a little bit more time. If it just tastes like soap, you can turn the heat off. You can also test your mixture by testing the pH of the soap. Ideally, soap should have a pH of 9-10.
Mix in Any Additives
If you have any essential oils or colors that you want to add to your soap mixture, you should mix them in now. Do not wait too long to add them since they will not fully incorporate into the solution if you allow it to cool before adding fragrances and colors.
Pour Your Soap
Now, it is time to put your soap into the molds. Pour or spoon your mixture into each mold, using a spatula or spoon to push the soap mixture into all of the mold’s corners and edges. Packing the soap tightly into the mold will prevent any bubbles from forming on the surface of your soap as it cools.
Allow the Soap to Set
Put your soap in a dry, cool place to set. You can even put your soaps in the fridge or freezer to expedite the cooling process. Some people cut their soap right after it sets, in a matter of hours. Others wait 1-3 days or longer.
Remove Your Soap From the Molds
Once your soap has been left to set for the length of time you find appropriate, you can remove it from the mold. Be careful when you take each bar out of its mold. If one of the bars breaks, you should set your soaps aside and let them sit for one or two more days to allow them to harden more.
After removing them from the molds, you can cut them into smaller bars, which will speed up the curing process. Let your soap sit in a well-ventilated, cool area for at least a day. Letting it sit long enough will ensure that all of the water evaporates from the soap. Being patient is difficult during this time, but if you allow your soaps to dry out completely before using them, they will last much longer.
Now your soap is completely done! You can use this soap as a body or hand soap, household cleaning soap, laundry soap, or even pet shampoo.
Conclusion
Now that you know the ins and outs of hot process soapmaking, you can keep your soapbox stacked with enough soap to clean yourself, your house, and your clothes at any time. Hot process soapmaking is a quick way to make however much soap you want, and it can be a lot of fun.