How To Make Soap From Scratch (The Step-by-Step Guide That Will Save You Time & Money)
Making your own soap is a wonderful way to ensure that something you put on your skin every day is made just how you want it to be. It is a creative, thoughtful, artisan process that requires some precision and yields fantastic, natural, high-quality results. So how do you become a soapmaker yourself?
To make your own soap from scratch, you will need to gather ingredients, supplies, and protective eyewear from a local store or online retailer. For a basic soap recipe, you will carefully weigh, combine, and blend the lye, distilled water, and oils. You will pour the final mixture into a mold.
In this article, you will find the detailed steps for making your first batch of homemade soap from scratch. Throughout the article, you will also learn the following:
- The basic science behind soap making
- The ins and outs of soap making safety since you will be working with lye
- What to do before you begin making soap
- Supplies you need to make soap
- Ingredients you need to make soap
- How to set up a soap-making workspace
Learn the Basic Science Behind Making Soap

Knowing a bit of basic science is essential to making fantastic soap that turns out the way you want it to. You certainly don’t need to be a chemistry whiz, but having a strong foundation of knowledge will help you understand how the steps of the process come together. It will also assist you if you need to troubleshoot any trials and errors along the way to mastering the technique.
While basic premade heat-and-pour soap bases exist on the market, making your own soap from scratch puts you a step ahead. It means you are in control of all ingredients and the end result, allowing you to tweak as you learn and make bars that meet all your expectations.
Here are a few basics to know about how soap-making works:
- Homemade soap requires lye and fat coming together. While lye is pretty straightforward, the fat(s) can be your choice of oils and butter that will have different effects on the overall bar of soap and how it treats your skin.
- Lye, a caustic salt also known by its technical name sodium hydroxide, can be dangerous. However, when handled with care and armed with knowledge, you will be just fine. Be sure to read our section about safety below.
- Saponification is more than just a great sounding vocabulary word. This is the chemical reaction that occurs between the lye and oil or fat ingredients that results in soap! This process also produces glycerin, which is like pure gold for your skin. Many store-bought soaps remove the glycerin because it’s more valuable sold separately or added to other products.
- For accurate saponification to occur, all lye must be used up and transformed into skin-safe soap. Therefore, exact measurements of each ingredient are required, and measuring by weight (instead of volume) is how it’s done in soap making.
- Once you’ve made soap, it consists of soap molecules with one end that likes water and one that doesn’t. This helps them work hard to break up dirt and germs to be easily washed away with water when washing.
A Note About Soap Making Safety and Lye
As mentioned above, lye is an essential element of making handmade soap. Lye is a powerful chemical that requires extreme care in handling. It is caustic, which means it’s capable of destroying or eating away what it touches through a chemical reaction.
It sounds like a strange ingredient for something that goes into a natural, skin-nourishing artisan product, right? Don’t worry, as Jan Berry, author of The Big Book of Homemade Products For Your Skin, Health, & Home, reminds us that every last molecule of the lye is used during the soap making process and in a chemical reaction as it reacts with the oil molecules.
This is the scientific process of saponification that ends up with soap plus glycerin. Therefore, there’s not a single bit of lye left in a bar of soap that’s properly made.
To make your own soap, you must handle the lye in its pure form before it undergoes the chemical process that transforms it into soap. Therefore, please adhere to the following safety recommendations when making your own soap from scratch:
- Wear eye protection such as goggles to protect yourself from any potential splashes
- Wear long sleeves and pants to protect your arm and leg skin
- Wear rubber or latex gloves to protect the skin on your hands
- Only add lye to liquids, never the other way around (which could create a volcano effect and result in a big mess)
- Work in a well-ventilated area – windows open with vents and fans on is suggested
- Do not directly breathe in the fumes when lye is mixed into the liquid.
- Ensure lye is only handled by adults
- Work in a space where there are no children or pets nearby
- Clearly mark your lye or lye solution with words and symbols indicating it’s a dangerous chemical.
- If a small amount of lye comes into contact with your skin, rinse continuously with ample cool water.
- If a large amount of lye gets on your skin, or if any amount splashes in your eyes, rinse immediately and get medical attention.
We know that a long list of safety procedures might not be something you expected to find in an article about how to make homemade soap from scratch. However, don’t let it deter you. You undoubtedly handle other potentially hazardous chemicals around your home with care, such as bleach, so just keep the same careful mindset and adhere to the guidelines we mentioned above.
If you prefer to watch and learn about lye safety, here is a video by Bramble Berry that’s less than 10 minutes long:
Basic Soap Making Terms
As you get into the world of making handmade soap, a few terms will come up time and time again. We want to help you understand the following keywords so you are not surprised when they come up in a recipe or tutorial.
- Emulsification – when the lye solution and oils are mixed together and will not separate from each other to go back to straight lye or oil again. “Emulsify” and “trace” are terms often used interchangeably.
- Saponification – the chemical reaction that occurs when lye and oil molecules transform and create new molecules of soap
- Soda ash – if your soap recipe results in any leftover lye that does not saponify, it will react with the carbon dioxide found naturally in the air, turning white and ashy looking. This is completely harmless but can discolor your soap and make it appear dusty or unattractive.
- Superfat – any extra oil or fat left in the soap that’s not combined with lye and turned into soap. Often, soap recipes are calculated on purpose to leave some percentage of superfat where the oil is left free-floating in the soap, and therefore, moisturizing the skin. Sometimes the term “lye discount” is used interchangeably with “superfat.”
- Trace – the point in the soap making process when lye water and oils emulsify and start to thicken up. Trace happens in stages:
- Thin or light trace – has no oil streaks and looks/feels like a thin cake batter, is easy to pour, starts to stick to the sides of the bowl.
- Medium trace – follows pretty quickly after thin trace, looks and feels like thick cake batter or thin pudding.
- Thick trace – looks/feels like thick pudding and holds its shape when poured, usually requires excessive blending.
To-Do Before You Make Soap
You are almost ready to get started making soap. There are a few things you need to do to plan and prepare for your first bars beforehand. You will need to identify precisely what you are looking for in your homemade soap, gather your soap making supplies and ingredients, and set up your workspace.
Identify What You Want in Your Homemade Soap
Do you want homemade soap that is nourishing to dry skin? Do you want a rich, creamy lather that’s a hard-working cleanser or something gentler on the skin? Would you like it to smell heavenly like fields of flowers? These factors may influence the ingredients and additives you use in your handmade soap, so identify what properties you are seeking in your homemade soap.
While we suggest starting with a basic, trusted, favorite soap recipe and process like the one we outline in this article, as you gain more experience with soap-making, you will soon be ready to try new recipes, additives, and soap making styles. When you get to that point, you will be able to fine-tune your recipe and process based on factors that are important to you.
After you have the basics for soap making down pat, you can begin to consider factors for your dream bar of soap related to:
- How it treats or affects your skin – gentle for sensitive skin, moisturizing, soothing, etc.
- How strongly or gently it cleanses
- Whether or not it exfoliates
- Color preferences
- Fragrance preferences
- Shape preferences
- Details, designs, or textures on top or throughout the bars
Please browse our other articles and search online for the perfect soap recipe and essential ingredients to add to achieve the results you are looking for.
Gather Your Soap Making Supplies
Next, you will need to gather a few supplies. Some you might already have around the house, while others you may need to invest in.
If you are just beginning to test the waters and try your hand at making soap, perhaps you can look to borrow a few supplies from a friend or acquaintance who is a soapmaker. This will help you build familiarity with the process and learn the supplies’ ins and outs. Assuming you choose to stick with the craft, you will have the upper hand in knowing what type to purchase when you are ready.
Gather the following supplies before you set out to make your first batch of homemade soap:
- Digital scale: A well-made, balanced bar of soap means you must precisely measure all ingredients, and they must be measured by weight and not volume. We’re talking about all ingredients, even water, and oils. You can find a decently priced digital scale online, or most big-box stores will have some options in the kitchen supply aisle.
- Thermometer: You will need to monitor the temperature of your lye solution and oils while making soap. Find a candy thermometer for this purpose and designate it only for use in soap-making (not candy or food).
- Small measuring container for dry lye: Select your container and mark it clearly for “LYE.” A plastic cup would work fine.
- A pitcher that can withstand heat: You will need a pitcher for mixing and pouring the lye and water solution. Stainless steel is recommended, or heavy-duty plastic should work. Heat-resistant glass may work for some time but eventually can develop weakness and cause breakage. Avoid glass pitchers.
- Large bowl or soap pot: You will use this to mix your complete soap recipe. If you have a large stainless steel or high-density plastic bowl, you can check this one-off. Ceramic or enamel-lined will also work. Non-stick surfaces and aluminum react negatively with lye, so avoid those.
- Immersion or stick blender: If you don’t want to stir vigorously for a long time, an immersion blender will be your best soap-making friend. It will shorten the required stirring time quite a bit. A regular handheld mixer with beaters will not work how you need it to.
- Heat-proof mixing utensils: Silicone spoons and spatulas will come in handy to mix your soap and scrape it out of the bowl into the mold.
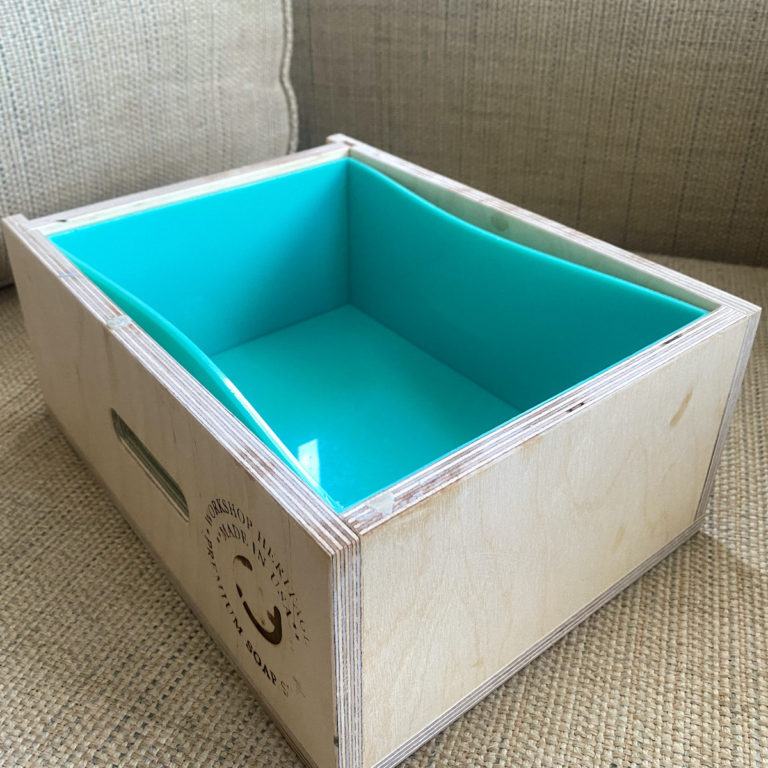
- Soap mold: A common choice is a rectangular loaf silicone mold, which is about two to three pounds (1.2 kgs or 48 oz). This will form one big loaf of soap that you will ultimately slice up. You may also select various shaped molds or one that has individual cavities. If you are not ready to buy a mold, get creative like the ladies at Soap Queen and use a plain old shipping box lined with freezer paper! Read more about this here.
- Safety goggles: You don’t need anything special as long as it protects your precious peepers.
- Long sleeves and pants, closed-toe shoes: You must keep your skin covered when working with lye in case of splashes.
- Gloves: Rubber or latex gloves will protect your hands when working with the lye mixture.
- Parchment or freezer paper: Classic parchment paper will come in handy for lining the soap molds and making a pleasant soap removal experience.
Gather Your Soap Making Ingredients
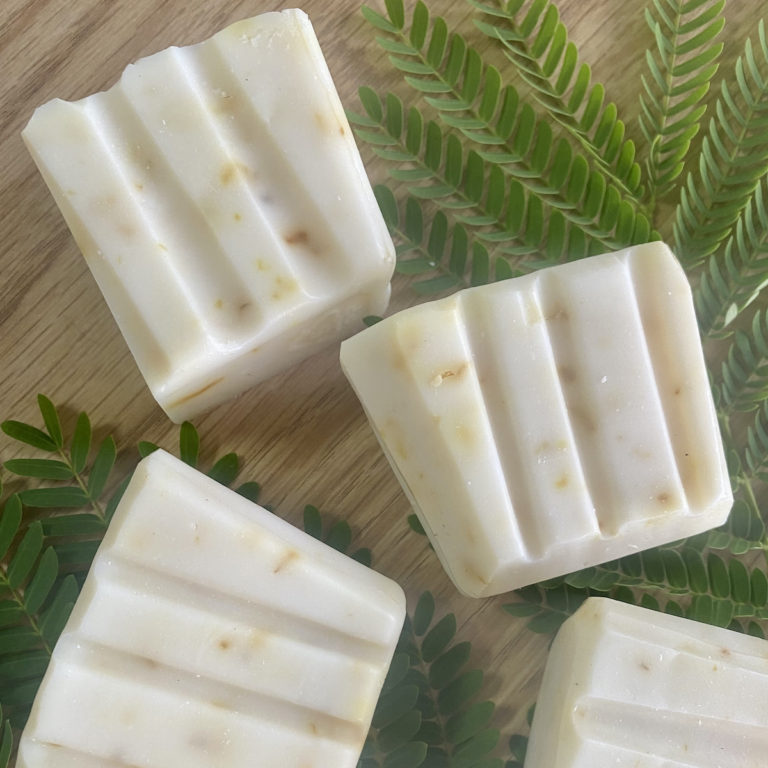
In this article, we will share the process for making one of our favorite basic cold process soap recipes, so you get an idea of the process and ingredients. This soap has no fancy-pants color swirls, exfoliants, or shimmery toppings. We strongly suggest you start with a recipe like this one before diving in with layers and fragrances. As you begin to make more of your own soap, you will learn more and soon be exploring new ingredients and recipes.
To get started with your first soap making experience, gather these ingredients:
- 8 oz coconut oil
- 15 oz olive oil
- 11 oz palm oil
- 4.8 oz lye
- 11.2 oz distilled water
Coconut, olive, and palm are three of the most common and well-liked oils used in homemade soap. Coconut and palm oils contribute to the soap by giving it firmness as it cures. Olive oil produces a creamy, mild lather that’s pleasing to the user. Coconut oil has excellent cleansing properties and generates giant, rich bubbles in the lather.
This recipe is accommodating to sensitive skin, with mostly olive oil and just a touch of coconut oil. Most users agree that olive oil is very gentle, while coconut oil can be a bit drying, so most people find this recipe produces a soap that works well with all skin types, even sensitive ones.
When all is said and done in this recipe, it has 5% less lye than would be required to turn all oils into soap. Therefore, it contains 5% superfat. In other words, 5% of the total oils are not turned into soap and float freely throughout the bar as a result. For this, your skin thanks you.
Set Up Your Soap Making Work Space
The last thing you need when you are smack in the middle of soap making is to be looking for a supply! Before you start making soap, set up your workspace. We echo the Soap Queen in suggesting the following tips for a well-organized space and smooth soap making process:
- Get your oils and lye right out in front of you. These are your superstar ingredients, so have them front and center in your workspace.
- Have the stick blender and tools ready just to the right (or left, if you are a left-hander) of your oils and lye. You want these items just a quick grab away for your dominant hand.
- Load up on prep paper towels. Soaping can be a messy process. If a mess happens, don’t fret, but do you need to clean up splashes of soap rather quickly. You can place paper towels at the ready near your easy-to-grab blender and tools.
- Keep your mold nearby. Depending on your workspace size, it’s great to have your mold off to the side just behind your active ingredients.
- When you are ready for colors, set them up to the left of your oils and lye, as well as extra empty containers for splitting your batch.
- When you are ready for fragrances, keep them off to the far right to avoid any accidental spills. Usually, adding scents is the last step, so you won’t need it until you need everything else.
Ready to begin? Here is your step-by-step guide for how to make cold process soap from scratch. In just seven steps, you will be on your way.
Gear Up
Once you are in that nicely assembled workspace with ingredients at hand, get all your safety apparel and gear on. Check that your toes, legs, arms, hands, and eyes are protected. You may wish to lay wax paper over your work area in case of any spills and to make for generally easy cleanup afterward. If you need to line your mold, do that now.
Weigh Your Ingredients
Weigh out your distilled water in a container that can withstand heat. Place it near a window so you can have a source of fresh air when you need it. Perhaps your kitchen sink is just the spot.
In another container, weigh out the lye.
Make Lye Solution
With care, slowly pour the lye into the water. With a heatproof spatula or spoon, stir gently until the lye has completely dissolved. The liquid will be clear, and you won’t be able to see any lye at the bottom of the bowl. Do not directly breathe in the fumes that arise from this solution!
Set the liquid solution aside somewhere where no children or pets will encounter it. It will naturally heat up, so allow it to cool down for about 40 minutes. Ultimately, the temperature should drop to about 105°F (40°C) before you proceed to the next step.
Note: Make sure you never add the water to the lye, which can actually be dangerous and gets exceptionally messy.
Prepare Your Oils
While the lye liquid is cooling, weigh out your oils. Since coconut and palm oil are semisolid at room temperature, liquify them by heating them in a double boiler. Once they’re ready, combine all oils in your big mixing container.
Before proceeding to Step 5, you want your oils and your lye solution to be within about ten degrees of each other.
Mix It All Up
It’s mixing time. Place your immersion blender into the oils and gently tap it against the bottom of the bowl a few times to release any air bubbles that may have gotten trapped under the blender head and brought down into the oil. Tap until you no longer see any bubbles coming to the surface.
Gently pour the lye solution into the bowl of oils. To start, leave your blender off and just hand stir for 20 seconds. Next, pulse several times. You will begin to see the mixture coming together, creating a creamy yellow batter.
Power on the immersion blender and mix the soap batter for about 20 seconds. Then go back to 20 seconds of hand stirring. Continue alternating with powered down hand stirring and powered on immersion blending every 20 seconds or so. This will help ensure you don’t overwork and burn out your blender’s motor.
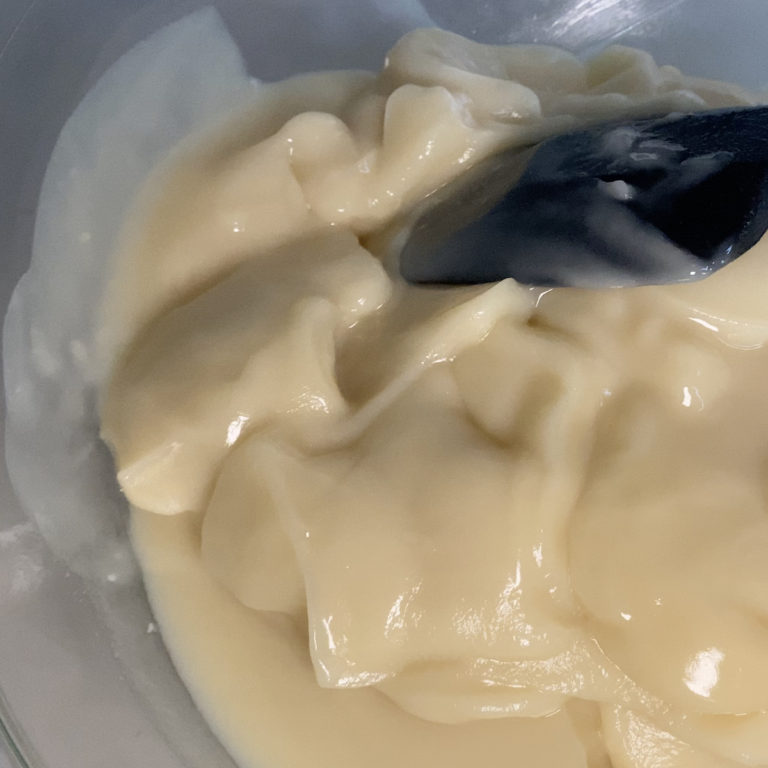
Continue mixing until you see a trace is reached. It will be thick enough that you see a faint, fleeting imprint when you lift the blender and drizzle some across the top.
Mold Your Soap and Wait
Since we’re making cold process soap, it’s now time to pour the soap batter into the prepared mold. Even though the soap is blended together, it’s still caustic and dangerous to the skin, so proceed with care and make sure you are still covered up with your eyes protected.
Pour the soap batter into the mold. Scrape your bowl to get every last drop! Give your mold a few taps on the counter to allow any air bubbles to rise to the surface. Cover the mold with a piece of wax paper, followed by the top of the mold (if it came with one) or a cardboard piece. Keep it cozy warm by tucking a quilt or towel around the mold. Move it to an area that will not get bumped for one to two full days.
Slice and Cure
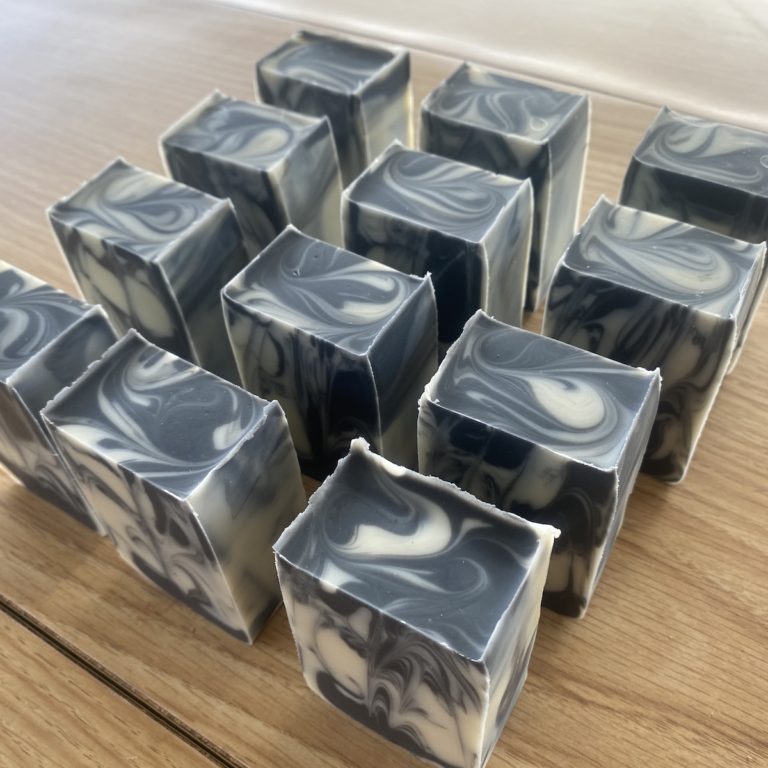
After 24 to 48 hours have passed since you poured your soap into the mold, remove it and slice it into bars. One inch (2.54 cm) bars are suggested. If your soap mold came with a knife, that’s going to work great. Otherwise, a sharp kitchen dough scraper knife or will also do the trick. If you’d like, you can use a miter box, ruler, or soap cutting box to help you keep the bars a consistent thickness.
Now is when the waiting begins: before use, you must let the bars sit out in the open air to cure for about four weeks on sheets of wax paper or a coated baking sheet. This is the time when water further evaporates from the soap, making it firmer and longer-lasting in the shower. If you must use soap before the full cure time, it’s alright, but it will not last as long.
Conclusion
Making homemade soap from scratch is a fulfilling, creative, and careful process that will yield beautiful results for yourself and others. Keep at it, as you will learn something with every batch and be making masterful recipes in no time.
Sources
- Practical Self Reliance: How to Make Soap – Soap Making for Beginners
- The Spruce Crafts: 21 Creative Handmade Soap Recipes for Beginners
- Soap Queen: Back to Basics – Simple & Gentle Cold Process Soap Recipe
- Elements Bath and Body: Understanding Trace in Cold Process Soap
- Tactile Hobby: Cutting Homemade Soap